Showing posts with label Craft. Show all posts

Monday, September 27, 2010

More swingsets from the sewing machine

I can't get enough of this pattern! I've just finished my 5th Oliver + S Swing set top. I really must post them to their Flickr pool huh?

With the onslaught 4 year old birthdays this coming month, I had to get cracking and start some serious sewing. First up was a top & skirt for Giles's buddy Amelia (I forgot to photograph that! Bec has to take some for me). I made it from a beautiful double muslin with fairy print from Calico & Ivy. It turned out really well, I just hope it fits. As expected, Amelia threw the dress aside without much of a glance but LOVED the hand-me-down My Little Pony & accessories. Typical! Hee Hee! I'm sure Bec will make her wear the top & skirt once or twice before it gets handed down to Tilly.


Next up was another of Giles's girl friends, whose party was this afternoon. Remember this fabric Jacq? I had enough to make one in size 5 for the birthday girl & just enough left over (with some creative piecing on the back placard - no close-ups I'm afraid) to make a size 2 for Tilly.


I made two chiffon flowers which can be used as hair-clips, or can embellish the front of the dress. I can't find a link right now but there are tonnes of tutorials out there, I know you've tagged it before Jacq. All you do is rough cut a bunch of circles, melt the edges of each circle with a candle or lighter, then stack them up gluing each one with hot glue. I put some sparkles in the center but you could put anything - buttons, sequins, seed-beads etc.

Tilly wore her outfit to the party - too cute - although I am very biased.


I'm going on a sewing frenzy in the next few weeks. With a birthday every weekend for the next 5 weekends I'm going to be busy. Next is a girl party, then 3 boys....Hmmmm what to sew next.......Ideas?

Tuesday, September 7, 2010

Vintsge ribbon headband

Ok, this post isn't going backwards in time, I made this today. A headband to go with my new, much shorter, hair-do.

I made it from true 'vintage' ribbon - it came from mums sewing stash so it has to be vintage!! Ha!


Monday, September 6, 2010

Shell Stitch Crochet Beanie

[caption id="attachment_297" align="aligncenter" width="300" caption="Miss T's Shell Stitch Crochet Beanie"][/caption]

Pattern from The Dainty Daisy. Size 12-24 month (fits well). Made from 100% merino wool on a G (6mm) crochet hook.

Anything that I can make within 2 of Miss T's naps is OK with me.

Oliver + S Swingset summer

[slideshow]

I've bought the Oliver + S Swingset Tunic and Skirt pattern and have been knocking a couple of outfits out.  The pattern, as always, is easy to follow and it comes together quite quickly. I traced out the pattern one night, cut all the pieces one afternoon during nap-time and then was able to complete the top in one evening.

This is my 1st made from some Micheal Miller fabric. This dress was using the size 2 Swingset Tunic pattern and lengthened about 2-3 inches to dress-length. I'm really pleased with how it has turned out. I was a bit disappointed that the size 2 was a snug fit on Miss T, that was until I realized I was using the wrong seam allowance (whoops!). I've since made another with the correct seam allowance (the black & red one) and this is a much more appropriate fit for a size 2. As you can see, I'm too chicken to attempt a button hole so I used my much-loved snap machine for the closures on the back.

I can envision whole wardrobe of these Tunics come Summer 2011. That is unless I buy some of their new 2011 fall patterns coming out soon......

5 min crafting - Dummy straps & bookmarks

I found this in the drafts folder - not sure if i've posted it before but I'm doing some housecleaning here in the WordPress Dashboard and thought I'd rather re-post than delete.........

Here are a couple of my 5-minute crafting activities.

Dummy straps:

I truly don't know how people survive child rearing without these dummy straps. While we aren't anal about washing the girl's dummies it is a pain when they are spat out on the floor. Normally at the grocery check-out, or at the bank counter or somewhere equally gross & filthy.

These are so easy to make. A piece of ribbon, snapped at both ends - one to loop around a suspender clip (I found mine at a local craft store for $2.70 for 2), one for around the dummy. You can sew the suspender clip in permanently if you wish. I made a cute one with bee ribbon too but didn't take a photo. Must do soon. The ribbons are all from Calico & Ivy.

Psychedelic strapPastel strap


Next up, jazzed up bookmarks. Nice -AnnieP papers adhered to gross freebie drug-company bookmarks using contact cement. The have a magnetic clasp inside so the stick to your page. Nice & free!

Magnetic bookmarksp1010314


And here's a random shot of Miss T.

Tilly's Toque


Geeze, you can see how old this post is, T is now 20months old, I think she is 12 weeks in this shot. BTW this is a beautiful beanie that Nanna Beth sent T when she was born, together with a poncho. Beautifully soft & warm. Beth you might like to know she still fits it!!

Sunday, July 11, 2010

Sally bag


Although I'm guilty of it too, it makes me a wee bit sad to see someones beautiful crochet/knitting/craft being carted around in a reusable shopping bag. They do have their uses people, but a Coles bag should be kept for the supermarket!

After Auntie Sally came by last week to help watch the kids while I sewed up the baby bibs & another gift (in drafts to be posted soon!) with her beautiful crochet blanket in said grocery bag I thought I should remedy this.

VoilĂ ! The 'Sally 'Bag'. Take one felted 100% pure Australian wool jumper, chop-chop-chop-it, embellish and there you have it. A roomy rather gorgeous bag ready for her next project.

I got all my inspiration for this design from this beautiful bag.

I said to Mark that I have problems letting go of many of my crafting endeavors and this one is particularly difficult as I've fallen in love with it as it came together. We're off to Dad's for lunch today so I had better drop it off to Sally before I find it filled with my crochet project!


Thursday, June 17, 2010

Wednesday, March 17, 2010

Vintage hankie rosette

How cute is this wee rosette made from a vintage hankie that was too sweet to possibly blow your nose into! I have a massive stack of hankies and scarfs from a friend of auntie sally's who is cleaning out her mothers house. Hmmmm what to do, what to do??? then I came across these ruffled rosettes. I cant claim this as my clever idea, thanks to Rufflesandstuff.

I think 3 or 4 of these toether would look good too.

Now, if you have any other ideas what to do with this stack, let me know.

P.S. this photo was taken by Giles. it was by far the best of my 'self-portraits' and all the ones mum tried to take.

Thursday, March 11, 2010

The 10 minute toddler skirt

it can't get much easier than this.

take 1 bandana, cut in half. sew up the 2 side seams to make a tube. overlock the raw (cut) edge then fold to make the casing for your waist elastic. guess how big your daughter's waist is (because she is fast asleep) then thread your elastic through the casing & sew ends together. go have a coffee and twiddle your fingers until said daughter wakes up so you can try on your newly sewn skirt.

DONE.


Thursday, February 25, 2010

Twins' Tie Tees

Happy news... "the twins" have arrived and E, A and the babes are doing great!! What and adorable pair, huh?!!!!


What could be cuter than tie tee onesies for the twins??!!!


I saw the idea recently at Saltwater Kids and was eagerly awaiting the next wee boy to arrive so I could try it out. Wow, how lucky was I (;0) when TWIN boys arrived!!!! Perfect.


I hadn't wanted to send typically matching outfits, but the opportunity to create mix and match, co-ordinating tie tee onesies seemed too adorable to bear. Hope you think so too. This was incredibly easy and quick to throw together. The challenge was finding plain onesies. "Joe" brand came through once more. I hope they like them...what do you think????


Click on photo for more....


Wednesday, April 1, 2009

Tilly's T-shirt

Tilly's T

A super fast project to be completed during a single Playschool episode:

  1. Go to What a Lovely Name, find your baby's name & then decide on the logo you like the best.

  2. Save it to the desktop.

  3. Import the pic into word. REVERSE THE IMAGE! (Me being the dumbass I am forgot to do this the first time. Tilly can only read her name in the mirror now)

  4. Print the image onto T-shirt transfer paper. Follow the instructions carefully to transfer the image onto a boring white hand-me-down T-shirt. Me, I had to guess at the instructions as I have lost the english ones & only have the ones in japanese, korean, arabic & chinese??  

  5. Try not to scald the shirt like I did & Ta-da. You're done!


These would be great embellishments to a little baby package for friends. I'll be making more of these for sure.

Thank you 'What a lovely name'!

Monday, March 23, 2009

Weekend Zig Zag Baby Quilt

One of the handiest baby gifts we were given when The Boy was born 2.5 years ago, was a quilt Jacqueline made us. It was made entirely from flannel and was the perfect size and weight for everyday use. We used it as a wrap, floor mat, spit-up cloth, pram & cot blanket, picnic blanket.....actually, we still do with our 2nd Wee-one who is now 10 weeks old!

As Felicity's baby shower is next weekend I thought I would try to make her something similar. 


 I used the cutting & piecing method described by the Purl Bee'sZig Zag Quilt. Because I wanted the quilt to be square & smaller than a crib-sized quilt, I cut:

  • Sixteen 4-7/8 inch squares from the pink fabric,

  • Sixteen 4-7/8 inch squares from the white fabric,

  • Thirty-two 4-7/8 inch squares from the yellow fabric,
    But didn't bother with the 

  • Three 4-1/2 inch x 32-1/2 inch strips from the yellow fabric


The quilt ended up being 8x8 squares, measuring X cm (X inches) square - Perfect! It's as if I planned it that way.


I backed the quilt with flannel, pink with small white stars. I added a strip of the flower fabric (made from the off-cuts) -partly because it looks good & everyone seems to be doing it, and partly because my flannel was too short so I needed to add extra length. I like the result a lot.


The end result is a very soft, compact quilt that is perfect for the nappy bag, bottom of the pram or bassinet. I hope she likes it.

I will definitely make another this way again. If I can make it in less than 48 hours with 2 kiddies, one of whom loves to play with the pin-cushion & sewing machine peddle, and another who feeds every 2-3 hours (or so it seems sometimes!), ANYONE CAN!

Sunday, March 8, 2009

A is for pain-in-the ASS...

A is for Apron should read:
A is for ALTERATION, or
A is for pain-in-the-ASS

I just fell in love with the Kaleidoscope apron that was published in the book A is for Apron & highlighted on Etsy's handmade blog 'How-to: Stitch an Apron' and linked to in Whipup and Craftzine. I've been squirreling this pattern away waiting for the right opportunity to make such a cute apron and as this weekend was Mel's kitchen tea, I thought this couldn't be a better pressie for her!
Now, with two kids (one being only 7 weeks old) my sewing time (or any time for myself for that matter) is very, VERY precious. The last thing you want is to leap into the project only to find at what felt like EVERY turn, there are mistakes to this gorgeous pattern & tutorial. Wrong enlargement size, wrong measurements, poor descriptions, the list goes on. Did I mention my time is very precious. After many expletives, some deep breaths and help from my techno-savy husband, I completed the apron. I stuck with it because I think it is a gorgeous looking apron and was worth the effort.
I gave it to Mel & she loved it. Doesn't she just look a doll!

I thought I would write up my modified pattern so that people who wish to reproduce the picture can do so without the trauma I went through.

Just for you interest use to following links to download:

The original pattern from Etsy

The revised templates published on the Lark Books website   (they are still errors in this template!)

Instead of downloading the pdf and trying to enlarge it at your local Officeworks or such, here is the pattern, enlarged as per the errata at Lark Books (found that a bit too late! I'd already cut out the 1st batch of fabric before I realised it didn't fit together - #@**@+!) ready for you to download & print. You just have to stick it all together.

I have done some major modifications to the waistband as the measurements given in the original & in the edited version are STILL wrong.
Here is a version that will work:

Friday, January 9, 2009

Putting my feet up

[caption id="attachment_106" align="aligncenter" width="269" caption="Lounge Pants"]loungepants[/caption]

I know you told me this morning to put my feet up before the big day but I thought I needed a pair of lounge pants that will fit my ample belly before I do. Just over 2 hours later, I have this pair of uber comfy capri-length pants. Thank god Mark entertained The Boy while I madly cut, sewed & ironed these beauties. The wonderful man also made us all FRESH spaghetti & meatballs for dinner in that time too. What a champion!

I had bought this fabric ages ago from a massive Spotlight sale. I think it was $4 for the remnant roll. I don't know how many meters were on the roll, but more than enough to make several more pairs of pants

[caption id="attachment_107" align="aligncenter" width="225" caption="PastaFace"]pastaface[/caption]

.

Saturday, June 7, 2008

Painted Children

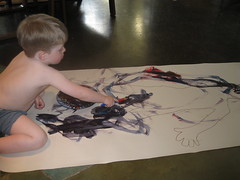
This is one of those things all kids just really dig.


Have them lay down on a large roll of paper and trace around them...the ensueing tickles and giggles are hilarious for all. It's a great opportunity to talk about our bodies, it's parts and what they are for. Hand the kids some markers, stamps, sticker, glitter or in our case paint and let them go at it. The best part is it's a fairly big canvas to paint, it takes a while and captures their attention longer than the typical 3 minute child attention span...just got to police the inevitable painted toes hands and maybe even bellies. Try it!


Thursday, March 27, 2008

Hmm, this isn't really helping Giles....

Geeze, I hope I'm not boring you with all these short posts. I'm  going back through my photos & posting all the ones craft-related. Not terribly interesting, but thorough.......

not helping...

This project was a 15 minute one, my kind of project these days - particularly when The Boy is awake). I found these polystyrene panels in the garbage bins at work last month and thought they would make great pin-up boards above my sewing machine.

The fabric is a lightweight canvas found in the $2 discount bin at Textile Traders. Come to think of it, nearly all my projects these days are from the $5 or $2 discount bins. Love a bargain.....

Anyhoo, a bit of packing tape and voila' two pinup boards. I haven't mounted them to the wall yet so will show you what the look like later.


I can't get any fabric out without The Boy running off with it, wrapping himself & rolling around in it. Luckily for this project, I had two identical pieces! 

Wednesday, March 26, 2008

Felting

bunny? My first attempt at felting - a bunny with flat feet. I didn't prefelt it enough so the feet stuck together when I hot washed it. Oh well, it gives me something to clip The Boy's dummy to at night.

The second addition to our felted creatures stash. I so want to make more of these. I love the colour graduations, it worked better than I expected. I thank Barbara for the angler-fish/dreadlock hairdo!

Instructions & patterns if you wish. I can post them later. On a photo uploading binge for you Jacq!

Wednesday, February 27, 2008

Incredible Hulk Pikelets


Incredible Hulk Pikelets

Originally uploaded by CraftyMammas.


A bit of green food colouring and Voila - Incredible Hulk Pikelets!
These would look good for a party, multicoloured.
The Boy liked them this way.

Wednesday, February 20, 2008

A proud mamma


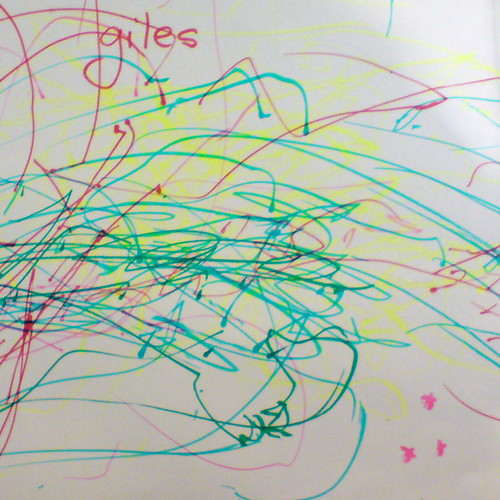
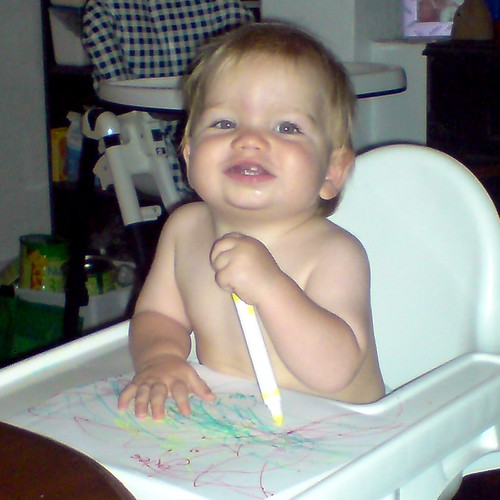
Along the crafty lines of my last post, I thought I would show you Giles' first ever drawing.

Ahh, aren't I the proud mamma.

Good thing these textas are washable, he likes to draw on the highchair more than the paper. He's quite adamant about it too! The photo was taken last month, but I just downloaded it off my phone this morning (again, killing time during an incubation) and thought I'd do a quick post.

Saturday, February 9, 2008

A 2-2 1sie

A Tutu Onsie inspired by some super cute clothes by Snazzidrawers I saw on ETSY a long time ago. I had figured it was too much work to cut tulle into thin strips, plus I found it impossible to find soft tulle, it was all stiff and scratchy, not so nice for a babe's bottom! What I did find was some netting made for crochet/knitting. It is precut into about 2cm strip. Pink trim from a wee store in Busselton, knicker elastic for the other two rows. Wove strips with wool needle. Have meters of the stuff now!!! Tonnes to make......

model

Oh, must continue post later The Boy just awoke!