Saturday, June 7, 2008

Painted Children

This is one of those things all kids just really dig.


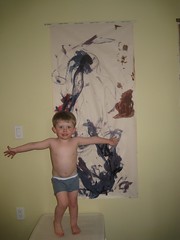
Have them lay down on a large roll of paper and trace around them...the ensueing tickles and giggles are hilarious for all. It's a great opportunity to talk about our bodies, it's parts and what they are for. Hand the kids some markers, stamps, sticker, glitter or in our case paint and let them go at it. The best part is it's a fairly big canvas to paint, it takes a while and captures their attention longer than the typical 3 minute child attention span...just got to police the inevitable painted toes hands and maybe even bellies. Try it!


Friday, June 6, 2008

Twirly Skirts

Well with only three days notice for a five year old's birthday...what do you do?!

Easton was invited to a young girl's birthday, from her Pre-school class, Gianna Campisi. I knew right away what I was going to make for her gift. She is very similar to Easton with her love of anything princess/dance related, and my mind instantly went to the few meters of fabric I had just thrifted from our local "Sally Ann" (Salvation Army).

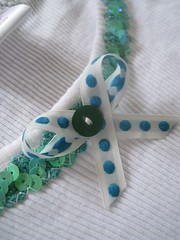
It was a beautiful ;) sequined aqua fabric, truly only dreamt up for a young girl of 4 or 5...or some figure skater or drag queen...dreamy!!! A little purple and aqua tule, sequined braid, elastic and silk lining...wa-la...a skirt made for only twirling and swirling. A tank top, equally "bedazzled" with sequins, ribbon and braid and there you have it...it was a hit!!! 4 days later...according to Gianna's mum, Brandi, she was still wearing it having not taken it off...even for bed.

Gianna's twirling skirt


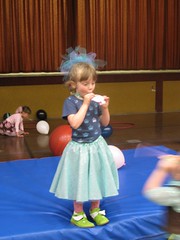
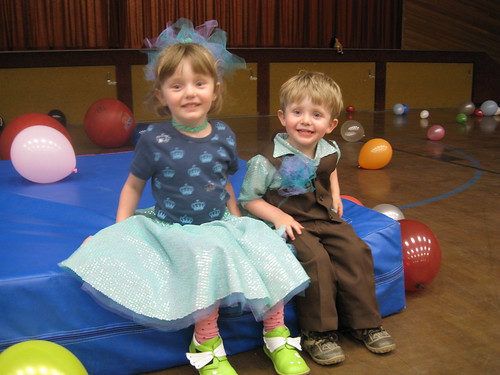
 Easton, was of course...intensely happy for Gianna, whilst simutaneously immensely jealous. I promised I would make her a twirly skirt for her girlfriend, Ella's 5th birthday which was a "dance party". She was exstatic, needless to say when I pulled it out on the day. Tasman was shattered! Where was his dance outfit?!!! Well last minute pressure always brings out the best in me...I whipped him up a Travolta/Saturday Night Fever style matching sequined shirt to wear with his authentic 70's brown polyester 3-piece suit. A little tule buttonhole and was the styliest man at the party! The pictures aren't great but you get the idea.


Thursday, March 27, 2008

My disappearing 9-patch quilt

finished quilt

Mel & Rhys asked us over for a BBQ to celebrate Mel & Mark getting new jobs & Mel's birthday. She is such as sweetie and always is really thoughtful with Xmas & birthday presents so I figured it was a great excuse to jump on board the sew,mama,sew! Quilting Month bandwagon.

I knew the disappearing 9 patch was a groovy and simple way to make a quilt but didn't realize you could make it have an overall pattern, rather than the randomness most of these quilts have. I was inspired Oh, Fransson's Doll quilt I saw on the Quilting Month Flickr Pool. It just took me about 15 min to find the photo but I really wanted to credit her with the inspiration for this quilt. I love the way the center four panels make one big panel. I didn't have any Joel Dewberry's Aviary fabric for the center focal panels so I figured, "I'll embroider something". Geeze, its not like I only had 1 week to make something!!!!! So, for a couple of days, I took the quilt top on the train, tucked my elbows in and finished the birds.

I really must get a better photo of this quilt, I forgot and only had my camera phone the day I gave it to Mel. Hmm, seems to be a recurrent theme here that I need to take better photos and edit these posts.......

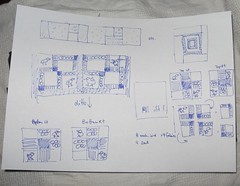
If you are interested in how to lay out your blocks to get this effect, go to my Flickr site and check out Before & After photos. Like I said, really easy to get something that looks quite complex.

OK, what else have I got for you...........

Hmm, this isn't really helping Giles....

Geeze, I hope I'm not boring you with all these short posts. I'm  going back through my photos & posting all the ones craft-related. Not terribly interesting, but thorough.......

not helping...

This project was a 15 minute one, my kind of project these days - particularly when The Boy is awake). I found these polystyrene panels in the garbage bins at work last month and thought they would make great pin-up boards above my sewing machine.

The fabric is a lightweight canvas found in the $2 discount bin at Textile Traders. Come to think of it, nearly all my projects these days are from the $5 or $2 discount bins. Love a bargain.....

Anyhoo, a bit of packing tape and voila' two pinup boards. I haven't mounted them to the wall yet so will show you what the look like later.


I can't get any fabric out without The Boy running off with it, wrapping himself & rolling around in it. Luckily for this project, I had two identical pieces! 

Library bag

I think this was one of the very first things I sewed when I was getting into surfing the many crafty blogs out there. I'll have to dig through and find the tutorial I followed.

OK, I found the tutorial HERE. I was cheap and just did a rectangle shaped bag with a separate handle. Better fabric usage! I learned how to sew a boxed bottom from this tutorial though. Well written & easy to follow. Thanks jenhook.


New Cowboy shirt


I'm getting fancy. A shirt made from Micheal Miller Retro Yipee fabric ($5/m discounted fabric - gotta love it) using the same Simplicity pattern as these pants. I tell ya' its a learning curve using a pattern & instructions! I wouldn't want to look at the sewing too closely, particularly at the skew-wif collar. From a distance, and for a first attempt, not bad me thinks. I chickened out and used snaps for the front. Who wants to sew button-hole manually when you have a snap machine on hand.

That snap machine has just been one of the greatest buys. I love it. I bought it for nappy making but have used it for tonnes of things including hanging block-out curtain in The Boy's room. Who needs velcro when you have snaps?!!?

I had to include this photo because its not often you take one of yourself and like it, plus it shows my new hairdo Jacq. There are some more photos on Flickr of the shirt too.

Wednesday, March 26, 2008

Lumberjack Pants

lumberjack pants

OK, here is my 1st attempt at following an actual pattern...with instructions even. I'm the kinda gal that simply lies the clothing that I want to duplicate directly onto the fabric, trace around and wing-it-and-see. It hasn't worked too badly in the past, but I gotta say it was miles easier using a pattern with instructions, even for such a simple thing as elasticated pants. These pants are actually a pj pattern (Simplicity #3856) that Bec purchased ages ago with the hope of making some summer cotton PJs for Amelia.

I'm pretty pleased with the result, as was The Boy. As you can see however, they need to have more room for his nappy to prevent the plumbers crack you see in the photos above. Even in disposables, the rise is too low. Its actually quite difficult to tell front from back so I've made a couple of pockets but haven't sewn them on yet.

The pants were a size 1 with about 4 inches cut off the legs! Yup, he has the same 'ducks-disease' I have. I have redrafted the pattern and plan to make a swath of these for winter. These were cotton drill with my fav Log Cabin print that I bought from Spotlight during a sale where fat quarters were only $1.50 each. The print looks like a bunch of logs side-by-side. cute.

So here you have it - Lumberjack pants.

Felting

bunny? My first attempt at felting - a bunny with flat feet. I didn't prefelt it enough so the feet stuck together when I hot washed it. Oh well, it gives me something to clip The Boy's dummy to at night.

The second addition to our felted creatures stash. I so want to make more of these. I love the colour graduations, it worked better than I expected. I thank Barbara for the angler-fish/dreadlock hairdo!

Instructions & patterns if you wish. I can post them later. On a photo uploading binge for you Jacq!

Wednesday, February 27, 2008

This weeks' WIP

I thought I'd post sneak peeks of what I'm up to this week.


WIP2 WIP1

You know me, I change projects more often than I change my undies.

Incredible Hulk Pikelets


Incredible Hulk Pikelets

Originally uploaded by CraftyMammas.


A bit of green food colouring and Voila - Incredible Hulk Pikelets!
These would look good for a party, multicoloured.
The Boy liked them this way.

Wednesday, February 20, 2008

Idle hands...


"Better keep busy, and the devil won't find so much for your idle hands to do"


I've been catching the train to Fremantle every day for work and have been moaning about the long commute ever since I started. Truth be told, it was less about the travel per se, and more about missing being at home with my two boys, feeling an extra 2.5 hours of travel time on top of an 8 hour work day was too much.
Anyhoo, rather than continuing to bitch about it, I now look upon my time on the train as a precious two lots of 40 minutes which is all my own. So, with my elbows tucked in as if I'm sitting at a full Christmas dinner table, I've delved into the world of embroidery.

I started with the Wee Wonderfuls Elf Stitchette pattern and have managed to complete both the boy & girl elf. The plan is to make them into Xmas stockings (yup, starting early this year).

Just as I finished those two and was in need of another 'on-the-go' project, I saw your del.icio.us tag linking to the Purl bee Sashiko Tutorial. Perfect! Two nights in front of TV and a trip to-and-from work and I've finished the embroidery on my bargain 35c onesie (photo to be inserted..).

It is so hard to find boy-appropriate crafts, so I was really pleased with this. The stitching is a little uneven (hmm... super stretchy fabric isn't the best for this project) & I ended up free-handing most of it (hmm... I have to invest in a fabric marker - the blunt china pencil isn't really cutting it). I'm happy with the end result.

So happy in fact that I've started another one this morning on one of The Boy's onesies. Bugger bugger! I got this much done before Daglish and then realized I left my thread at home. Bugger! I had to sit and twiddle my thumbs for the rest of the trip. What am I going to do on the way home?? Bugger.

I'll load up some photos tonight of the finished work. I'm blogging at work during (yet another) incubation with photos from my phone.

Oh! good-o. My timer has just gone off and I've run out of stuff to ramble on about.
A proud mamma


Along the crafty lines of my last post, I thought I would show you Giles' first ever drawing.

Ahh, aren't I the proud mamma.

Good thing these textas are washable, he likes to draw on the highchair more than the paper. He's quite adamant about it too! The photo was taken last month, but I just downloaded it off my phone this morning (again, killing time during an incubation) and thought I'd do a quick post.

Thursday, February 14, 2008

Look Sharp!

...Or 'How you kill time during an incubation'


Jacq tagged a cool craft for kids using sharpies and some solvent to make these firework/flower patterns.
Thought I would give it a go in in the lab on some tissue. Will take some isopropanol home and try it on some fabric.

Sunday, February 10, 2008

Figs & Crepes

crepe & fig
Title says it all, no?

We are so lucky to have such a great friend who keeps us supplied with free-range eggs, tomatoes, parsley, 'church bread', hot cups of coffee, fresh cookies and/or cake, play-dates at a minutes notice, good chats and always good laughs all within a 5 minute walk from our house.

Last time we were down at Bec's, we came home with a bag of home grown figs. Dare to dream hey Jacq?!? 5 min simmer on the stove-top and Voila, instant fig compote. This just sung out for fresh crepes, so of course, I obliged. Yummy!!

Saturday, February 9, 2008

A 2-2 1sie

A Tutu Onsie inspired by some super cute clothes by Snazzidrawers I saw on ETSY a long time ago. I had figured it was too much work to cut tulle into thin strips, plus I found it impossible to find soft tulle, it was all stiff and scratchy, not so nice for a babe's bottom! What I did find was some netting made for crochet/knitting. It is precut into about 2cm strip. Pink trim from a wee store in Busselton, knicker elastic for the other two rows. Wove strips with wool needle. Have meters of the stuff now!!! Tonnes to make......

model

Oh, must continue post later The Boy just awoke!

Quilting round-and-round

Quilt1Remember this fabric? I finally cut into it and made Giles a quilt following one of Martha's tutorials.

It is a dead-easy quilt to make as "the design is created simply by sewing strips around a center piece to form concentric rectangles." I was able to cut the strips while The Boy was taking his bath (I did this on the floor of the bathroom!) and did all the piecing that night after he went to bed. All up, it took around 5 hours to make the quilt top.

Quilt2The next night I sewed the backing on & machine quilted by stitching in the ditch in a concentric circle going out from the center rectangle (I don't have a good photo of the back to show you, but you get what I mean). As I didn't have any quilting batting, and am trying to 'use what I have', I used some printed polar fleece that a friend had given me that I was never quite sure what to do with. It is a great cheap alternative to quilters batting and it has made a thin, but nice & warm quilt.

I made the binding from the animal print fabric and followed Heather's instructions. Ta Da!

Editited to add: I forgot to say I found more of the animal print at Textile Traders for $9.95/m so bought some more to make a summer grobag/sleepsac as well. I used Bec's no bias binding tutorial. Mum laughs and says when he is in bed with the gorbag & quilt, he disappears and all you can see is a head. 


You can see a pretty crap photo of it HERE.

Wednesday, January 9, 2008

Dress in action

Bec just sent me some photos of the 4-in-1 dress in action.


So, how did it go??? It was a bit too big around the middle so the dress slips towards the front, poor Bug has her butt showing alot of the time! Good thing it is so appleish & cute! The excess fabric also causes the back to bunch a bit. I could trim off the contrast band at the back, but both Bec & I like that detail. So, at Mark's suggestion, we are going to try putting two snaps on the front & back panel to stop the dress pivoting at that point. Hopefully that will stop it opening up so wide & slipping to the front. Wow, that description is clear as mud :)


Wednesday, January 2, 2008

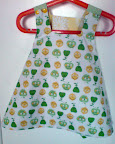
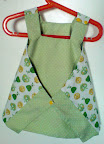
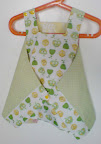
4-in-1 dress

I loved the simplicity of this dress, so set out to make one for Amelia for Xmas. Christmas got a little hectic and I missed the day but it is better late than never. Sorry Amelia, at least I got it finished before Winter set in :)

Using Mark's digital calipers, a dress of Amelia's & Giles as a moving dress dummy I upscaled a pattern from this photo. I adjusted it it make the dress a lot shorter to try and get it above her knees. The short length will hopefully make climbing (her new found, and well practiced skill) easier. the other adjustment was to use snaps instead of ties for the front and back. I figured with a squirmy 1yr old, snaps were much easier than trying to tie two bows. For an older child ties would look nice. Oh, I also used snaps on one of the shoulder straps as the neck hole looked a bit small & it was an excuse to use more snaps!.

So here it is, 4 dresses for the price of 1...

Dress 1 and 2; Front & Back


Dress 3 and 4; Front & Back


I'm really pleased with how it looks. I'll give it to Bec tomorrow so hopefully we will have some 'action' shots soon.

I'd love to make one for Easton, I just don't know what size to make it. Perhaps you could measure her chest & length for me.

P.S. Sorry for the quality of the photos. Just as you get your camera fixed Jacq, I dropped our Canon A90 tonight while taking photos of the dress! It landed on the lens and has pushed it all out of alignment. It won't even turn on without a 'lens error' message. BUGGER!!! These photos (and many to come) were taken on my cell phone. Bugger, bugger, could it happen at a worse time when buying a new one is out of the question? bugger. Oh well, these things happen.